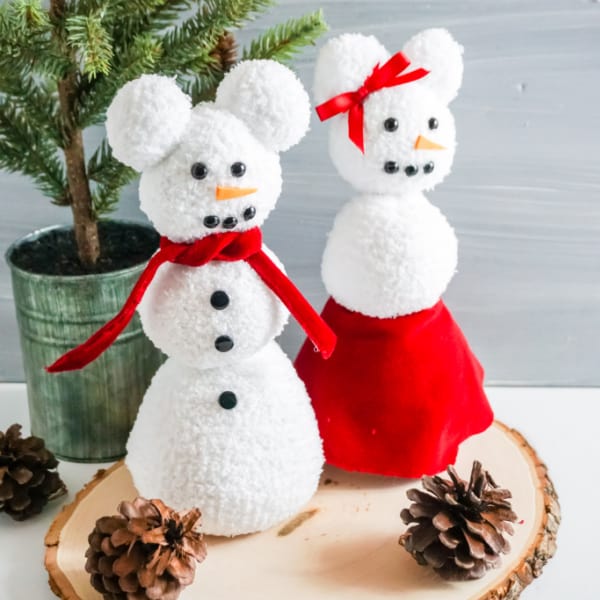
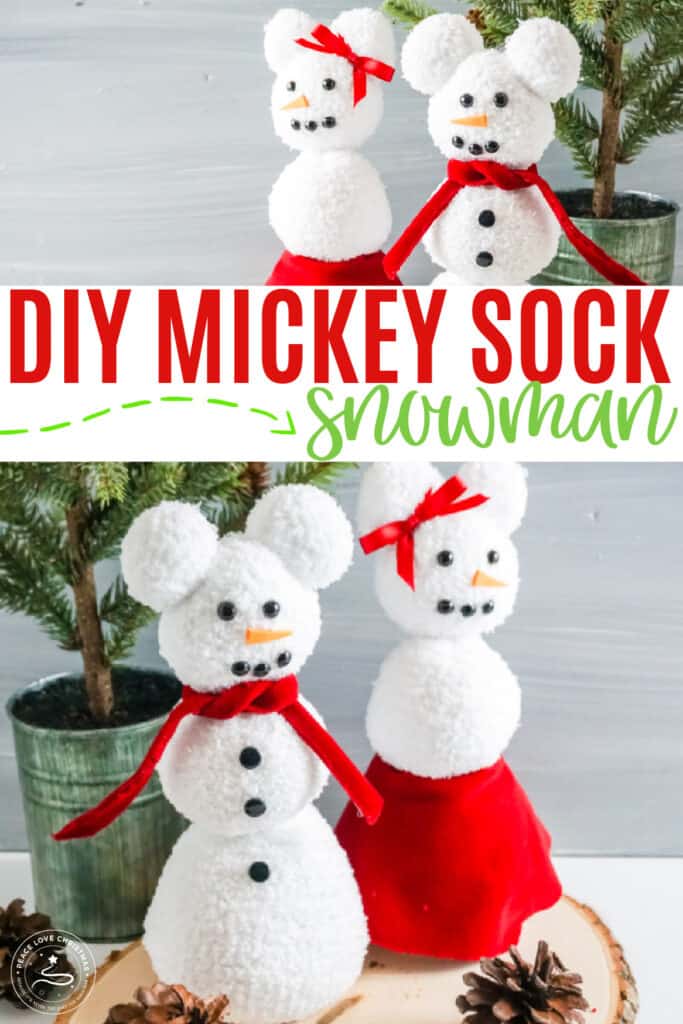
This sock snowman craft is perfect for fans of Mickey & Minnie. This quick holiday DIY craft makes a cute holiday decor for your home, or use it as a homemade Christmas gift for family, friends, teachers or coworkers.

HOW HARD IS IT TO MAKE A SNOWMAN OUT OF SOCKS?
This easy snowman sock craft is actually simple to create. This DIY project does NOT use rice, which I find better. (There’s less rice spillage to have to clean up after the crafting is done.)
SUPPLIES
Gather up the short list of supplies to make this snowman out of socks. The kids may want to help, too.
Supplies
- White Fluffy Socks
- Red Ribbon
- Red Velvet
- Red and White Polka Dot Ribbon, optional
- Polyfill
- Bamboo Skewers
- Tiny Neon Green Pom Poms, optional
- Small Neon Green Pom Pom, optional
- White Embroidery Thread
- Rubber Bands
- Small Black Beads
- Orange Craft Foam
Tools
- Hot Glue Gun & Glue
- Scissors
- Fabric Pencil
- Ruler
HOW TO MAKE SOCK SNOWMAN WITHOUT RICE (Step by Step with Photos & Printable)
I can promise you that this sock snowman craft is fun to make. These male and female snowmen are unique and add a fun focal point to a room.
Make these more seasonal by using them as a simple winter decor in January, February, and March.

STEP 1: PREPARE THE SOCKS
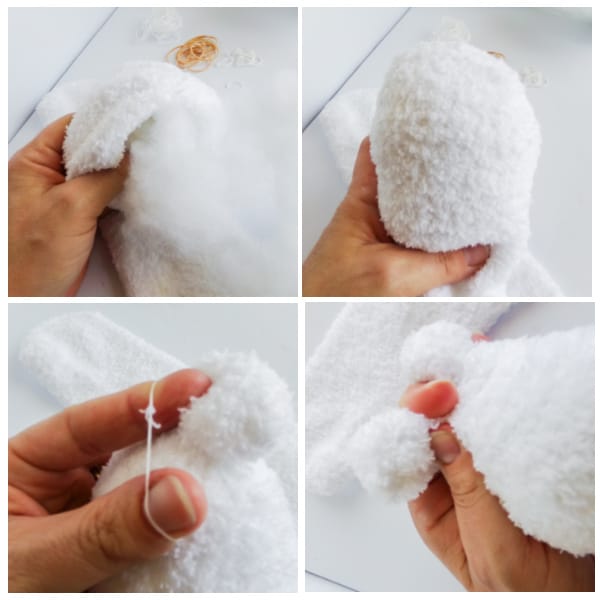
Working with one sock at a time, fill the sock full, but not packed, with the polyfill. Using the rubber bands, section off the sock into fairly equal ⅓ sections.
Pull up an about ½ inch ball of sock and stuffing on each side of the toe end of the sock and, with the embroidery thread, tie a thread around the base of the pull-up and tie tightly,
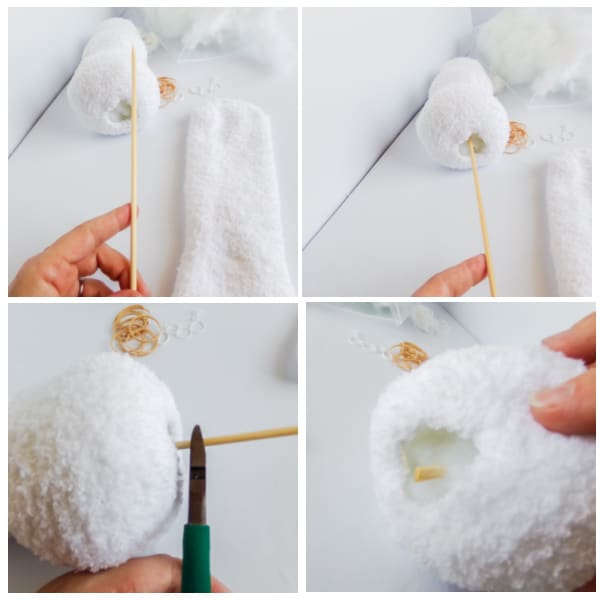
Slide a bamboo skewer through the center of the sock, trimming it to be even with the opening of the snowman.
Tug the edges of the opening of the sock toward the skewer and hot glue it in place, closing the bottom up.
STEP 2: DECORATE THE SOCKS
Make a tiny bow with the red ribbon and hot glue it in place in front of one ear, designating that snowman as Minnie (and thus a snowwoman).
Cut a ½ inch wide section of red velvet about 8 inches long. Fold this rectangle in half longways and hot glue in place. Wrap this around the non-bow-adorned snowman just under the head and hot glue in place to make a scarf.
You can repeat this for the second snowman (Minnie) or you can use the red with white polka dots ribbon to make a scarf. If you want to add baubles to the ends of the scarves, you can use the neon green pom poms to make a teeny tiny mickey shape. I ultimately decided that the scarf wasn’t the look I was going for on Minnie.

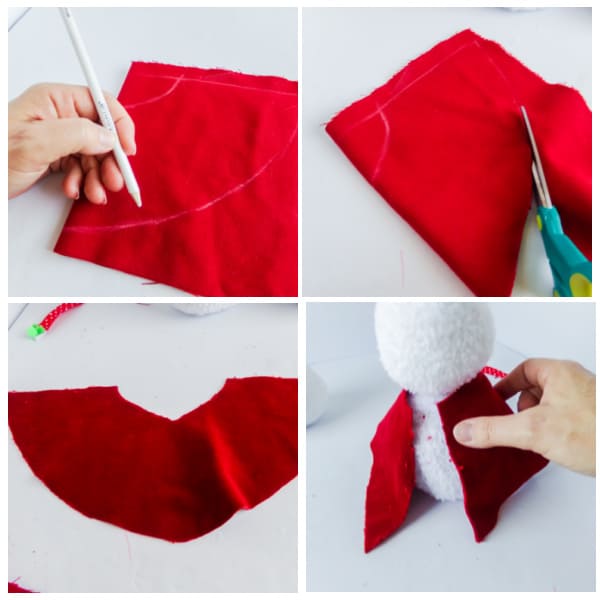
Make a skirt for the Minnie snowwoman by folding your velvet in half, then drawing a 5-inch diameter quarter circle, with one end on the fold line. Then draw a parallel 3-inch diameter quarter circle on the fold line about 3 inches away. Then square off the end not on the fold line, about 5-inches from the fold line.
Cut this rounded rectangle shape out then hem the edges, as necessary.
STEP 3: SHAPE THE SOCKS
Wrap this shape around the top of the middle and bottom balls of the Minnie sock snowwoman and hot glue in place along the back.
Cut thin tiny triangles from the orange craft foam and hot glue the triangle to the center of the head pointing off to one side.
Add two small black beads to each face above the carrot nose, 3 beads under the nose for a smile, and 3 beads down the front of the Mickey for buttons. Then display and enjoy!

You can easily print off the full list of supplies and instructions below for this easy Sock Snowman Craft. Just print via the printable craft card below.
Mickey Sock Snowman Craft (without rice!)
Equipment
- Hot Glue Gun & Glue
- Scissors
- Fabric Pencil
- Ruler
Materials
- Two White Fluffy Socks
- ¼- inch Red Ribbon
- ⅛ yd Red Velvet
- ½- inch Red and White Polka Dot Ribbon optional
- Small Amount of Polyfill
- 2 Bamboo Skewers
- 4 tiny Neon Green Pom Poms optional
- 2 small Neon Green Pom Pom optional
- White Embroidery Thread
- 4 Rubber Bands
- 13 small Black Beads
- Scraps Orange Craft Foam
Instructions
- Working with one sock at a time, fill the sock full, but not packed, with the polyfill. Using the rubber bands, section off the sock into fairly equal ⅓ sections.
- Pull up an about ½ inch ball of sock and stuffing on each side of the toe end of the sock and, with the embroidery thread, tie a thread around the base of the pull-up and tie tightly,
- Slide a bamboo skewer through the center of the sock, trimming it to be even with the opening of the snowman.
- Tug the edges of the opening of the sock toward the skewer and hot glue it in place, closing the bottom up.
- Make a tiny bow with the red ribbon and hot glue it in place in front of one ear, designating that snowman as Minnie (and thus a snowwoman).
- Cut a ½ inch wide section of red velvet about 8 inches long. Fold this rectangle in half longways and hot glue in place. Wrap this around the non-bow-adorned snowman just under the head and hot glue in place to make a scarf. You can repeat this for the second snowman (Minnie) or you can use the red with white polka dots ribbon to make a scarf. If you want to add baubles to the ends of the scarves, you can use the neon green pom poms to make a teeny tiny mickey shape. I ultimately decided that the scarf wasn’t the look I was going for on Minnie.
- Make a skirt for the Minnie snowwoman by folding your velvet in half, then drawing a 5-inch diameter quarter circle, with one end on the fold line. Then draw a parallel 3-inch diameter quarter circle on the fold line about 3 inches away. Then square off the end not on the fold line, about 5-inches from the fold line.
- Cut this rounded rectangle shape out then hem the edges, as necessary.
- Wrap this shape around the top of the middle and bottom balls of the Minnie sock snowwoman and hot glue in place along the back.
- Cut thin tiny triangles from the orange craft foam and hot glue the triangle to the center of the head pointing off to one side.
- Add two small black beads to each face above the carrot nose, 3 beads under the nose for a smile and 3 beads down the front of the Mickey gnome for buttons. Then display and enjoy!
If you loved this fun Christmas craft be sure to check out these other great craft ideas:
- DIY Mickey Bell Ornament for Christmas
- DIY Baby Yoda Inspired Ornament
- Grapevine Wreath Ornaments with free SVG file
- DIY Grapevine Mickey Christmas Wreath


Leave a Reply