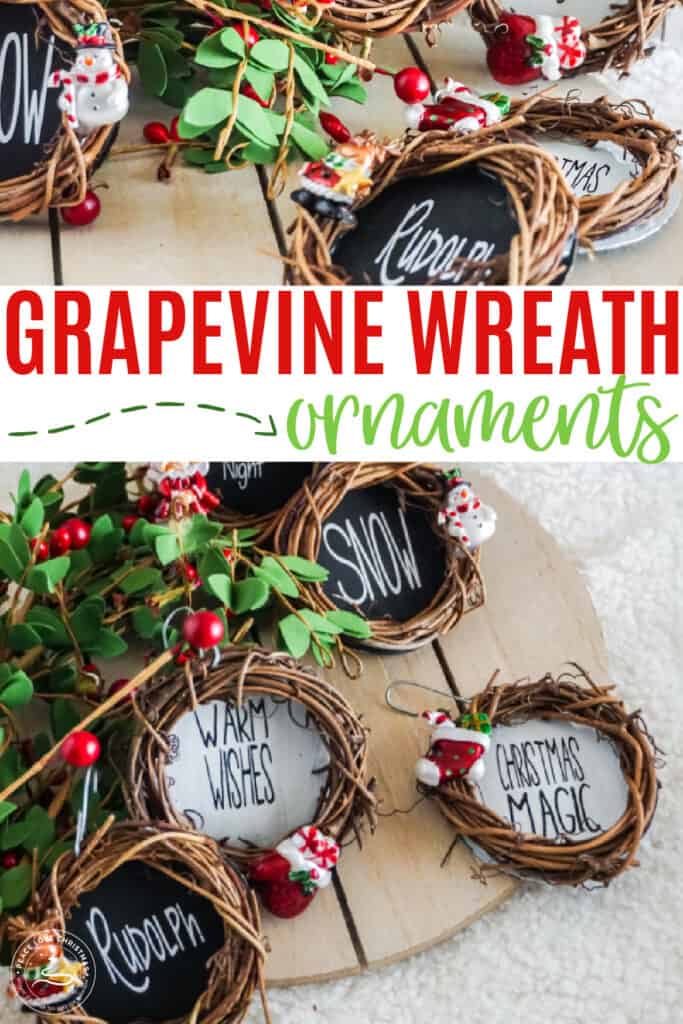
These miniature grapevine wreath ornaments are adorable and this tutorial comes with a free SVG cut file to make this Christmas craft even easier to complete. This ornament will look great on your tree this year.

- WHAT SIZE GRAPEVINE WREATHS ARE USED?
- SUPPLIES NEEDED TO MAKE A GRAPEVINE WREATH ORNAMENT
- TOOLS NEEDED FOR THIS ORNAMENT PROJECT
- HOW TO MAKE GRAPEVINE WREATH ORNAMENTS
- STEP ONE: PAINT CARDBOARD
- STEP TWO: CUT CIRCLES
- STEP THREE: CUT VINYL
- STEP FOUR: WEED & ATTACH
- STEP FIVE: GLUE CIRCLE TO WREATH
- STEP SIX: ADD HANGER & BUTTON
- WHAT IF I DON'T HAVE A CRICUT?
- PRINTABLE INSTRUCTIONS
- Grapevine Wreath Ornaments
WHAT SIZE GRAPEVINE WREATHS ARE USED?
There are different sizes of grapevine wreaths available at most craft stores.
This project is adaptable to the size of wreath you are able to get or have on hand.
I prefer a 3-inch wreath. It is still small enough to be ornament sized, but big enough that the word on the wreath can be clearly read.

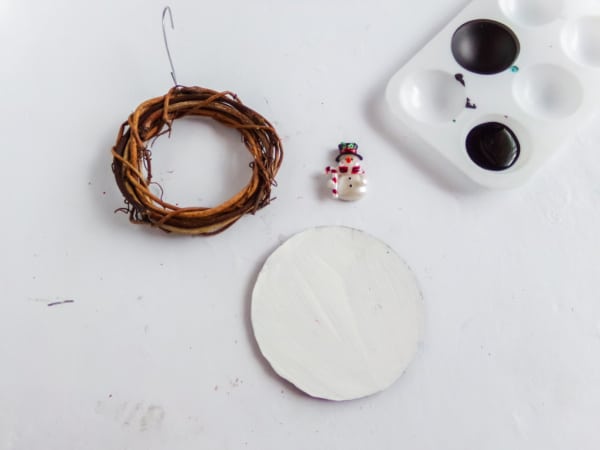
SUPPLIES NEEDED TO MAKE A GRAPEVINE WREATH ORNAMENT
Some of these supplies are things you may have around the house or can be used by recycling items at home. This is a great way to use your stash or craft supplies and save money.
- Mini Grapevine Wreaths (2 to 3-inch size)
- Thin Cardboard (like cereal boxes)
- White Acrylic Paint
- Black Acrylic Paint
- White Heat Transfer Vinyl
- Black Heat Transfer Vinyl
- Holiday Buttons
- ¼-inch Ribbon
- Cut Files for Mini Grapevine Wreaths (you can download further down in this post)
TOOLS NEEDED FOR THIS ORNAMENT PROJECT
This ornament tutorial utilizes an electronic cutting machine like a Cricut or Silhouette. If you do not have one of these machines I will give you some tips on how to still create a beautiful project!
- Cricut Explore Air2, Cricut Joy or Cricut Maker
- Light Grip Mat
- Cricut EasyPress Mini (or iron)
- Hot Glue Gun & Glue Sticks
- Scissors
- Paintbrushes

HOW TO MAKE GRAPEVINE WREATH ORNAMENTS
These grapevine wreath ornaments are so cute you will want to make extras to give out as gifts. It is easy once you get started to make a whole bunch in one sitting.
I have this tutorial set up so you will be making 6 ornaments that all have a different message on them.
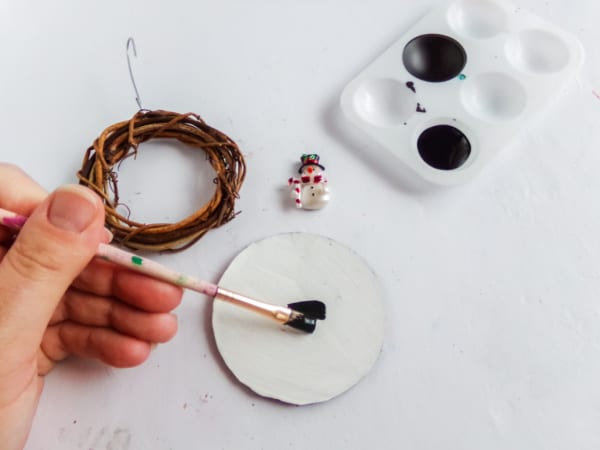
STEP ONE: PAINT CARDBOARD
Grab an empty cereal box and cut a flat piece of cardboard. This is the perfect thickness for the project.
Paint one section of the cardboard white and one section black using the acrylic paint. Allow these to dry completely.
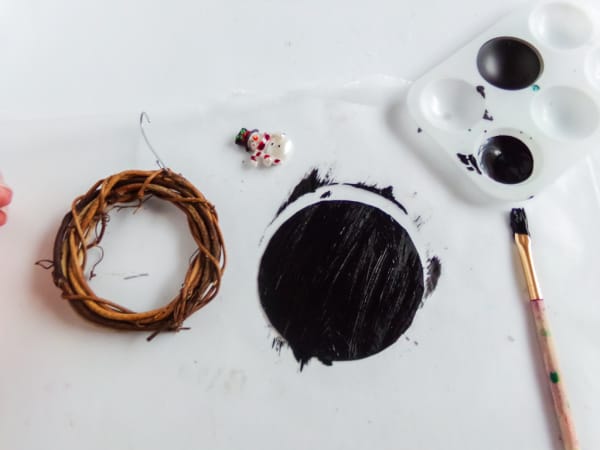
STEP TWO: CUT CIRCLES
Once the cardboard is dry it is time to cut some circles out.
It works best to lay one of the wreaths on the cardboard and trace a circle around the outside edge of the wreath onto the cardboard.
Cut out 6 circles. Three need to be white and three need to be black.
Set the circles aside for now and DO NOT glue them to the wreaths yet.
STEP THREE: CUT VINYL
Now it is time to download the free SVG cut file.
Click here to download: Grapevine Wreath Ornament SVG File
Once you have downloaded the cut files you need to upload them to Cricut Design Space.
Pick which of the sayings you would like on the white wreaths and which on the black wreaths. Based on that determination, cut the corresponding lettering on the opposite colored heat transfer vinyl.
Don’t forget to mirror the images AND make sure they’re sized correctly for your particular grapevine wreath size.
Also, I like to select “attach” or “weld” for simple text images like this so that I have less trouble keeping them in order when I go to apply the designs to my blank.
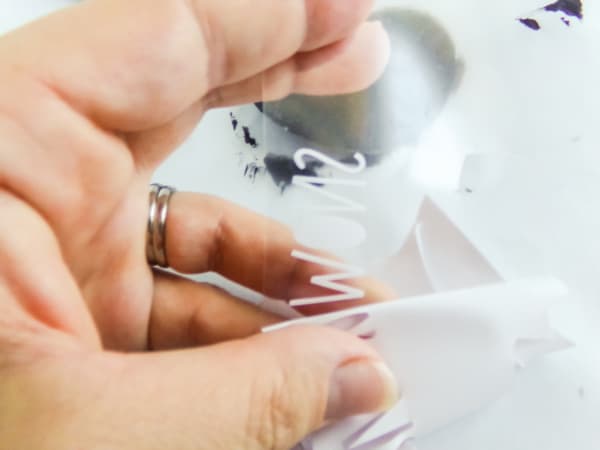
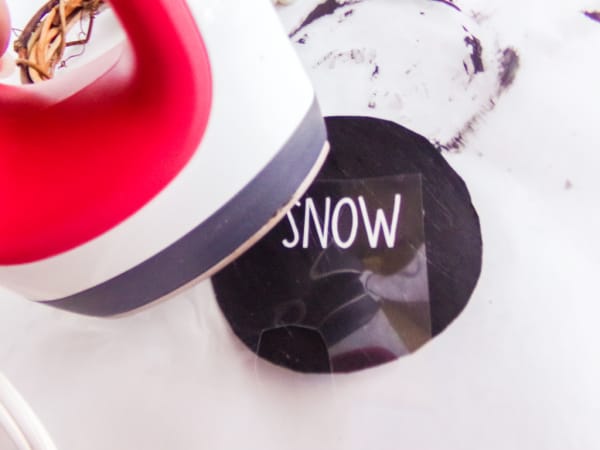
STEP FOUR: WEED & ATTACH
Weed your designs and apply the corresponding phrase to each cardboard circle, as desired.
Be sure to wait 5-seconds before removing the clear transfer tape sheet to help make sure the vinyl adheres to its best ability.
You can use the Cricut EasyPress Mini to heat set the vinyl to the cardboard.
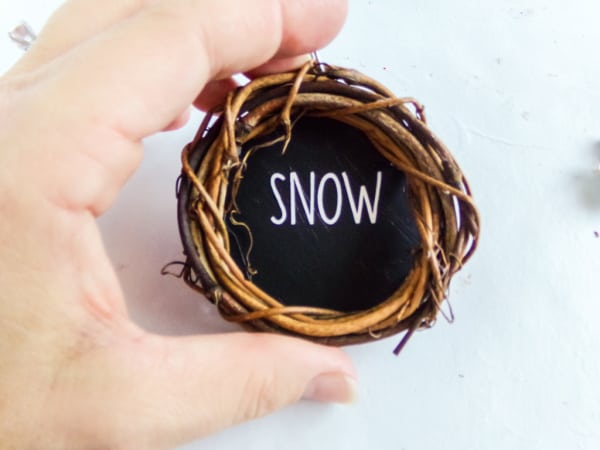
STEP FIVE: GLUE CIRCLE TO WREATH
Put hot glue on the back of the grapevine wreath and sit it down centered on the cardboard circle so you can see the word in the middle.
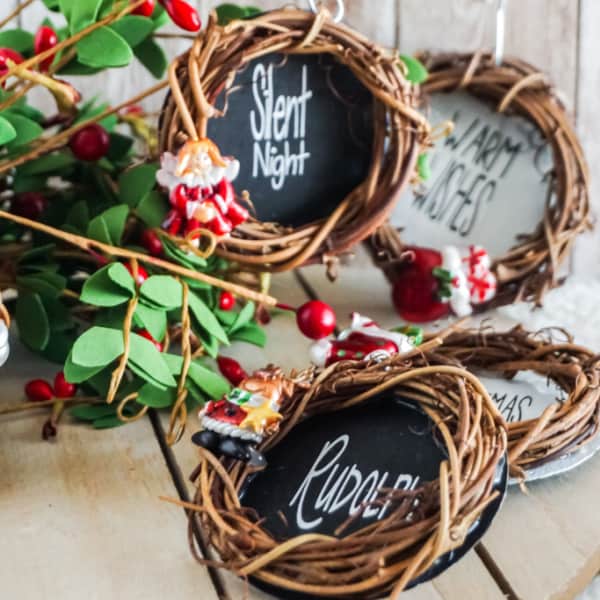
STEP SIX: ADD HANGER & BUTTON
Add the finishing touches to your ornament by adding a ribbon at the top so you can hang the ornament. You can also use a wire ornament hanger for convenience.
It is also fun to hot glue a cute Christmas button or embellishment to the front of the wreath to dress it up a little bit.

WHAT IF I DON’T HAVE A CRICUT?
This project is still very doable even if you don’t have a cutting machine.
One way to complete the project is to head to the craft store and buy some letter stickers. Look for small letter stickers that will fit inside the wreath space.
Another option is to use a small letter stencil and some paint. You can paint the messages on the cardboard.
PRINTABLE INSTRUCTIONS
I have the complete supply list and instructions for these sweet grapevine wreath ornaments available for you to print off for your convenience below.

Grapevine Wreath Ornaments
Equipment
- Cricut Explore Air2, Cricut Joy, or Cricut Maker
- Light Grip Mat
- Cricut EasyPress Mini
- Hot Glue Gun & Glue Sticks
- Scissors
- Paintbrushes
Materials
- 6 Mini Grapevine Wreaths
- Thin Cardboard like cereal boxes
- White Acrylic Paint
- Black Acrylic Paint
- White Heat Transfer Vinyl
- Black Heat Transfer Vinyl
- Holiday Buttons
- 1 ¼- inch Ribbon
- Cut Files for Mini Grapevine Wreaths
Instructions
- Paint a portion of your cardboard with white acrylic paint. Paint a second portion of the cardboard with black acrylic paint. Allow the paint to dry completely.
- Using one of the grapevine wreaths, trace and cut out around the outside edge of the grapevine wreath onto the painted cardboard to make a circle of cardboard the same outside diameter as the grapevine wreath. DO NOT GLUE THE CARDBOARD TO THE WREATH YET. Cut 6 cardboard circles, 3 in white and 3 in black.
- Download cut files and upload them to Cricut Design Space. Identify which of the sayings you would like on the white wreaths and which on the black wreaths. Based on that determination, cut the corresponding lettering on the opposite colored heat transfer vinyl. Don’t forget to mirror the images AND make sure they’re sized correctly for your particular grapevine wreath size. Also, I like to select “attach” or “weld” for simple text images like this so that I have less trouble keeping them in order when I go to apply the designs to my blank.
- Weed your designs and apply the corresponding phrase to each cardboard circle, as desired. Be sure to wait for 5-seconds before removing the clear transfer tape sheet to help make sure the vinyl adheres to its best ability. Use the Cricut Easypress Mini to heat set the vinyl.
- Tie-on a ribbon to the top of each grapevine wreath.
- Hot glue a grapevine wreath to each cardboard circle.
- Attach a holiday button to each of the wreaths on the front and hang from the tree!
If you love making ornaments be sure to check out these other great ornament tutorials:
- DIY Mickey Bell Ornament
- Easy DIY Candy Sprinkle Ornament
- Unicorn Christmas Ornament
- DIY Wood Slice Ornaments


Leave a Reply