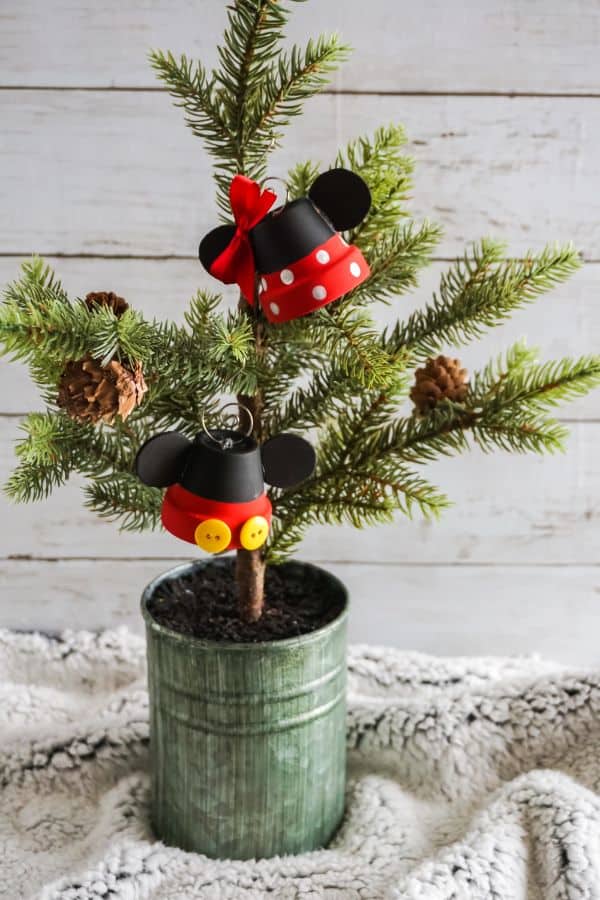
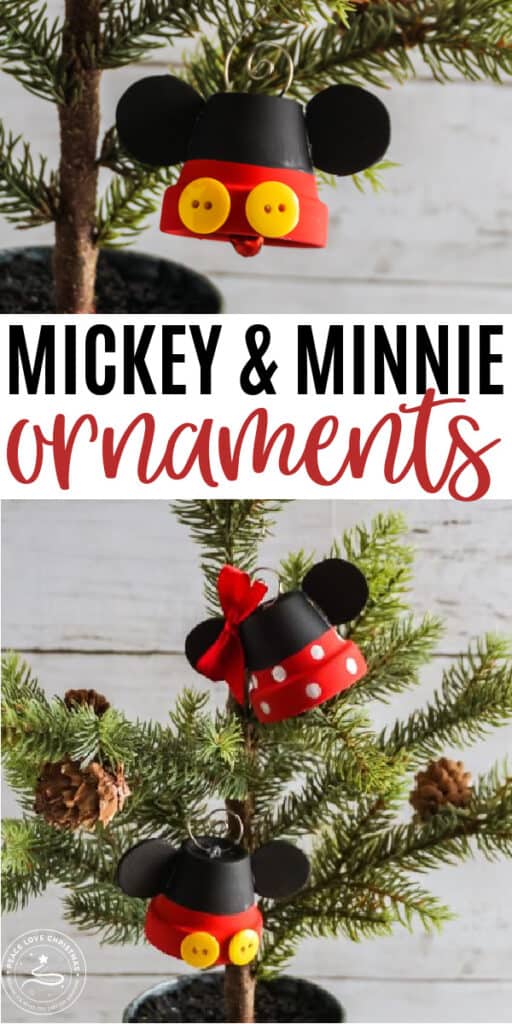
If you love Disney decor you will have fun making a DIY Mickey bell ornament for Christmas. You make even make a Minnie bell ornament to decorate your tree.
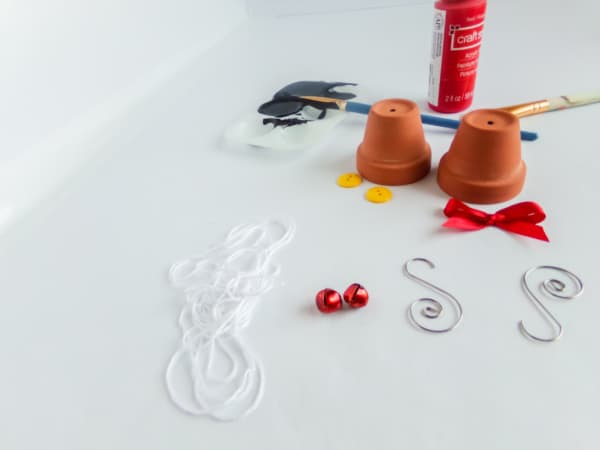
SUPPLIES FOR A MICKEY ORNAMENT
These easy Christmas ornaments are made with small terra cotta pots and turn out so cute! Kids can even help make these ornaments for a Disney Christmas.
- 2 Mini Bells
- 2 – 1-inch Terra Cotta Pots
- 2 – ½ inch Yellow Buttons
- Red Acrylic Paint
- White Acrylic Paint
- Black Acrylic Paint
- ¼-inch Red Ribbon
- 2 Wire Ornament Hangers
- Black Craft Foam
- A small amount of embroidery thread
TOOLS NEEDED
I love crafts that don’t involve a big long list of tools. This Christmas craft is simple and only requires a few tools!
- Scissors
- Paintbrush
- Pencil
- Painter’s Tape
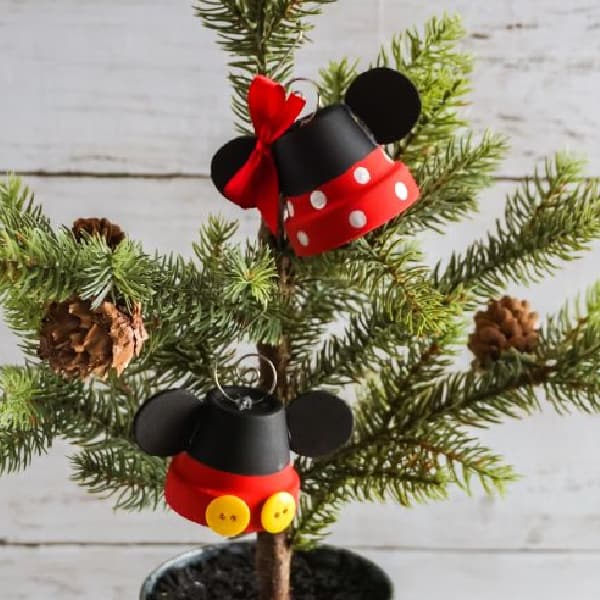
HOW TO MAKE A MICKEY BELL ORNAMENT
It always amazes me how easy it is to turn things into Mickey Mouse. This Christmas ornament tutorial is no different. In minutes you will turn a little clay pot into a Mickey or Minnie ornament!

STEP ONE: MAKE MINNIE’S BOW
Start off by making the bow that will go on the Minnie Mouse ornament.
Tie the red ribbon into a small bow about 1 inch across. Set the bow aside for now.

STEP TWO: MAKE EARS
Now we will cut the mouse ears out of the black craft foam.
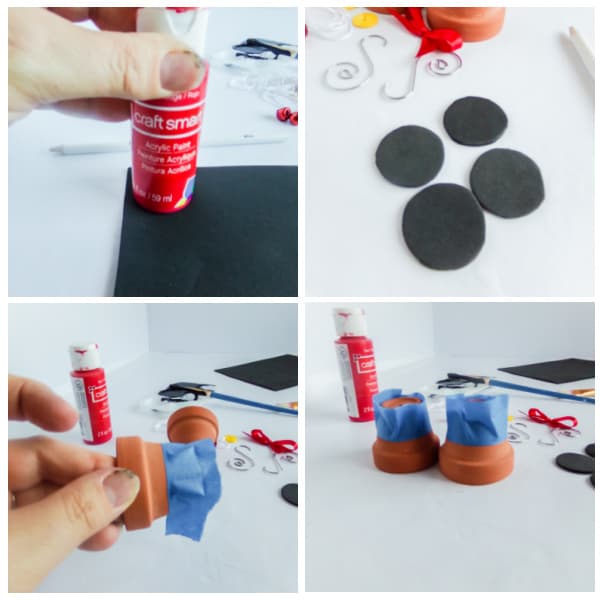
Use the bottom of your bottle of acrylic paint as a guide or make a ¾ inch circle to draw 4 circles on your black craft foam with the pencil.
Cut out the four circles and set aside.
Tape off the bottom half of your pots with painter’s tape so we can get ready to paint.
STEP THREE: ADD BELLS
Bells are a big part of Christmas and we are going to make these ornaments into bells.
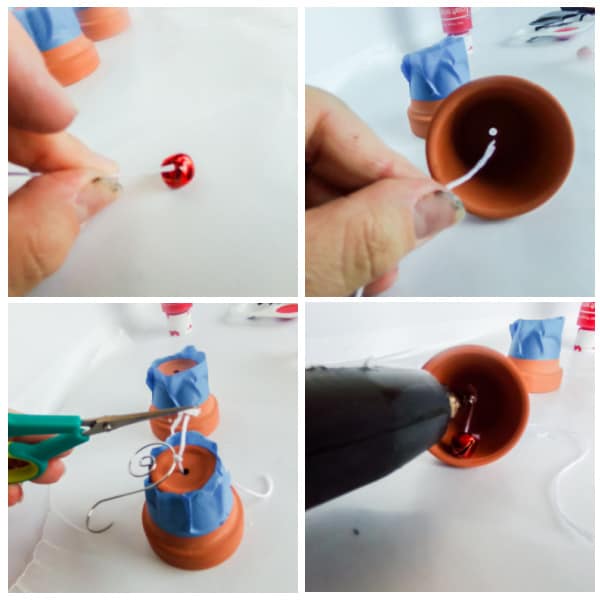
Thread a bell onto a small amount of string then thread the ends through the center of the pot, through the hole in the bottom of the pot.
Tie the ends of the thread onto the ornament hanger. Hot glue the string in place on the inside of the pot. Repeat this process with the second pot.
STEP FOUR: PAINT POTS
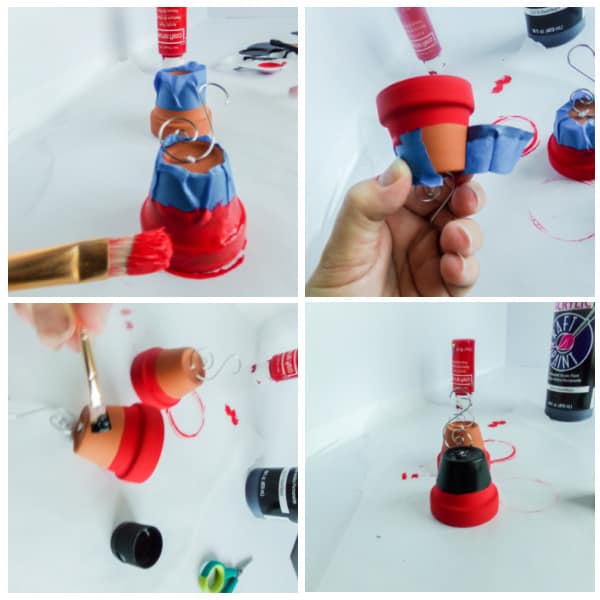
Paint the non-taped end of each pot red. Then allow the paint to dry completely.
Next, remove the painter’s tape and go ahead and paint the remaining portion of two pots black. Allow the paint to dry completely.
STEP FIVE: ADD EARS
Cut off about ⅛-inch of each of the black craft foam circles on one side, making a flat area.
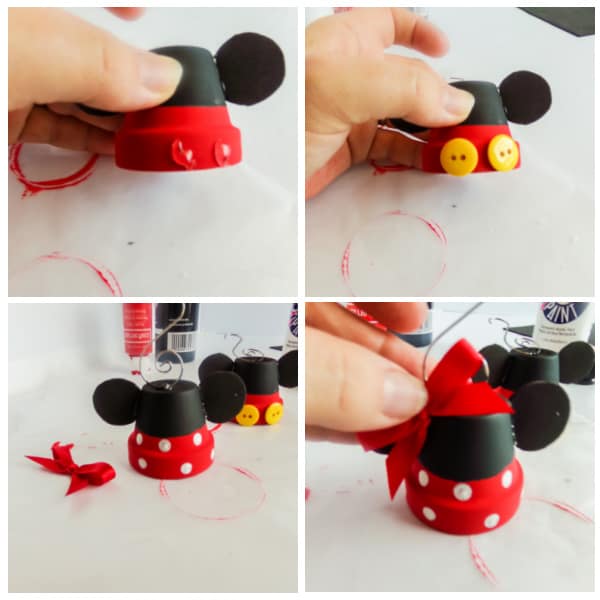
Hot glue one of the black craft foam ear shapes to each side of each painted pot in the black painted portion of the pot for the Mickey and Minnie ears.

STEP SIX: EMBELLISH
Now we will add the embellishments so these ornaments look like our friends, Mickey and Minnie.
Hot glue the two yellow buttons to the front side of one of the pots, side by side, in the red-painted portion of the pot.
Using the end of your paintbrush, make polka dots with white paint on the remaining pot in the red painted portion of the pot. Allow this paint to dry completely.
Hot glue the bow onto the front of the white polka-dotted pot. This will help distinguish Minnie from Mickey!
DIY MICKEY BELL ORNAMENTS
You can print off the complete supplies, tools, and instructions for this fun DIY Mickey Bell Ornament via the printable card below.
DIY Mickey Bell Ornament for Christmas
Equipment
- Scissors
- Paintbrush
- Pencil
- Painter’s Tape
Materials
- 2 Mini Bells
- 2 1-inch Terra Cotta Pots
- 2 ½-inch Yellow Buttons
- Red Acrylic Paint
- White Acrylic Paint
- Black Acrylic Paint
- 1 ¼-inch Red Ribbon
- 2 Wire Ornament Hangers
- Black Craft Foam
- Small amount of embroidery thread
Instructions
- Start by making the bow for the Minnie ornament by tying your red ribbon into a small bow about 1 inch across. Set aside.
- Use the bottom of your bottle of acrylic paint as a guide or make a ¾ inch circle to draw 4 circles on the black craft foam with the pencil. Cut out the four circles and set them aside.
- Tape off the bottom half of your pots with painter’s tape.
- Thread a bell onto a small amount of string then thread the ends through the center of the pot, through the hole in the bottom of the pot. Tie the ends of the thread onto the ornament hanger. Hot glue the string in place on the inside of the pot. Repeat with the second pot.
- Paint the non-taped end of each pot red. Allow the paint to dry completely.
- Remove the tape then paint the remaining portion of two pots black. Allow the paint to dry completely.
- Cut off about ⅛-inch of each of the black craft foam circles on one side, making a flat place.
- Hot glue one of the black craft foam ear shapes to each side of each painted pot in the black painted portion of the pot.
- Hot glue the two yellow buttons to the front side of one of the pots, side by side, in the red-painted portion of the pot.
- Using the end of your paintbrush, make polka dots with white paint on the remaining pot in the red-painted portion of the pot. Allow this paint to dry completely.
- Hot glue the bow onto the front of the white polka-dotted pot. Hang from the tree!
If you love easy Christmas crafts be sure to check these out:
- DIY Baby Yoda Inspired Ornament
- Unicorn Christmas Ornament with Cricut
- DIY Grapevine Mickey Christmas Wreath
- Easy DIY Candy Sprinkle Ornaments
Be sure to PIN this for LATER and SHARE on FACEBOOK!


Leave a Reply