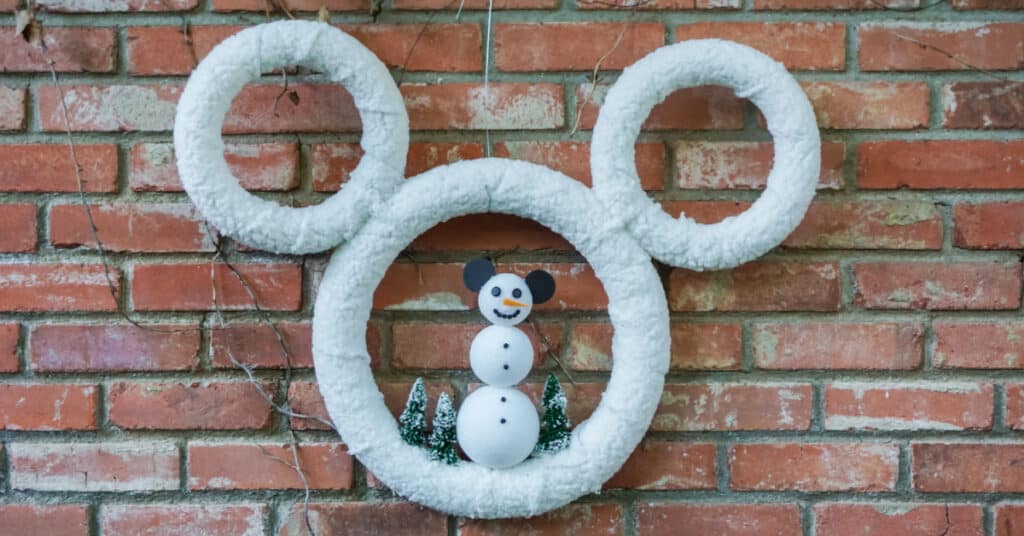
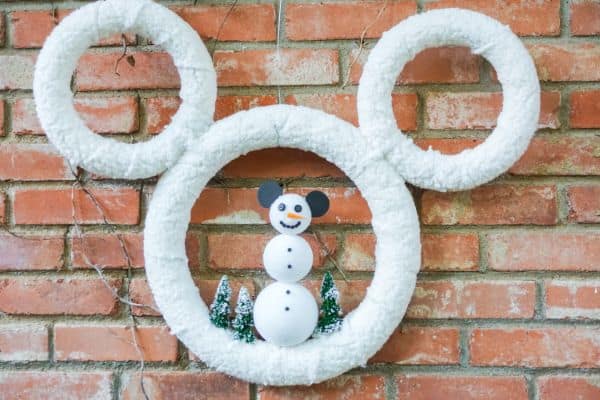
This Snowman Mickey Mouse Wreath DIY is such a fun holiday craft! If you’re looking for a fun holiday wreath to showcase your Disney spirit, this simple DIY Mickey Mouse wreath is the best!

WHAT IS THE BEST PLACE TO HANG THIS DIY MICKEY MOUSE CHRISTMAS WREATH?
The best part about this DIY Disney wreath is that you can hang it up wherever you want. It’s great for the front door, on a window, or even over your fireplace mantle right at home.
SUPPLIES
You just need a few simple supplies to get started!
- White Sherpa Fabric
- Foam Wreath Form
- Foam Wreath Forms
- Bamboo Skewer
- Foam Ball (3)
- Scrap Orange Craft Foam
- Small Bottle Brush Trees
- Small Black Beads
- Small Black Buttons
Tools
- Scissors
- Ruler
- Hot Glue Gun & Glue
- Exacto Knife
- Pencil
HOW TO MAKE A MICKEY MOUSE WREATH DIY
When it comes to Mickey Mouse wreath DIY ideas, this is one of the best. You’ll love how the directions walk you through the process from start to finish easily.
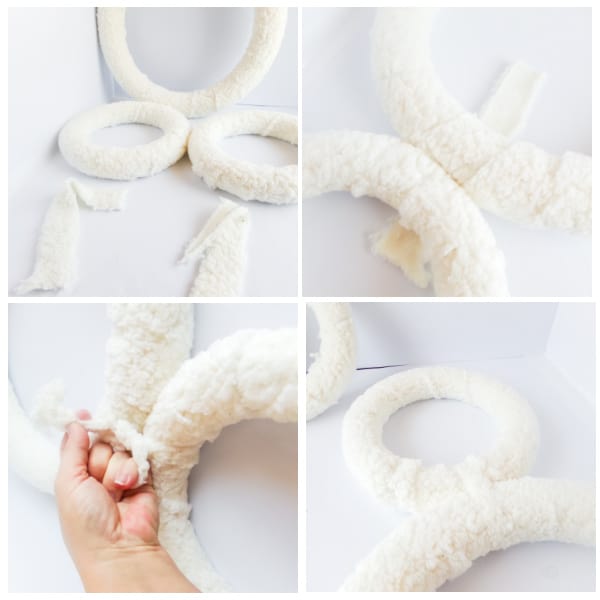
STEP 1: GLUE THE WREATHS
Start by cutting the fabric into strips. Then take one strip and wrap it firmly around the wreath and glue. Repeat this process to cover the wreath.

Once covered with fabric, glue the end to the wreath to hold the fabric in place.

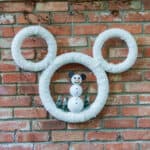
Repeat the process for the smaller wreaths as well and then glue them together once covered to create the Mickey Mouse look.
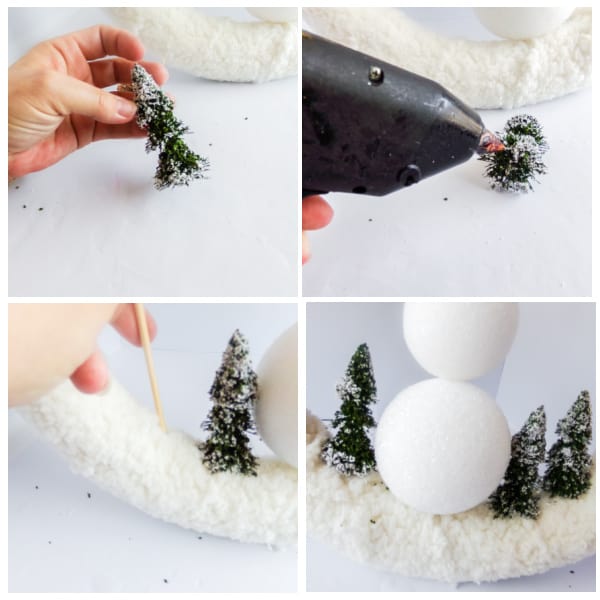
STEP 2: MAKE MICKEY MOUSE
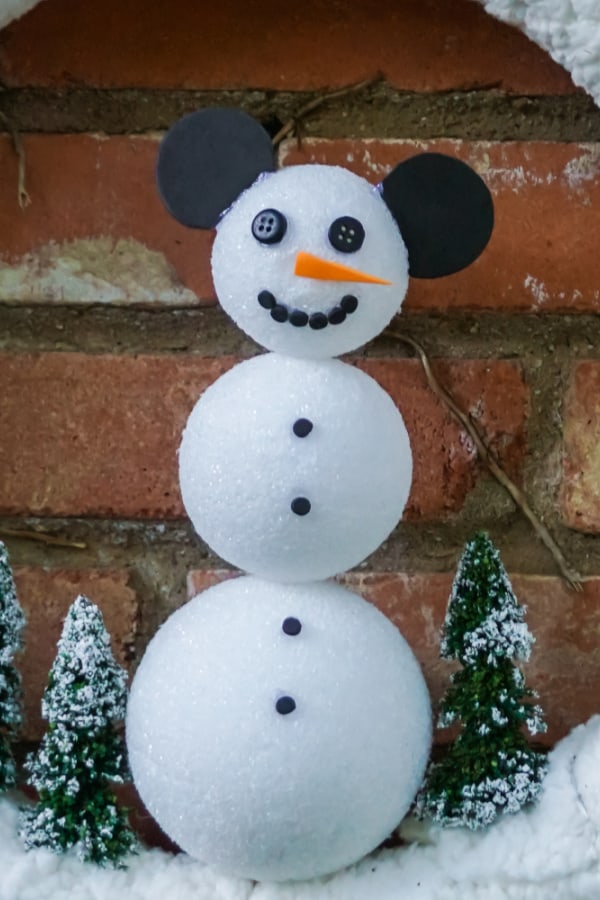
Grab the three foam balls and slide them in order onto the bamboo skewer. This is what is going to be your Mickey Mouse on the wreath.

Make a small hole on the bottom of the wreath and stick the skewer in the hole to hold Mickey into place.

STEP THREE: ADD TREES
Glue the trees around Mickey Mouse on the wreath.
Cut out the orange triangle needed for the face as well as the circles for the ears. Attach using glue and attach the eyes and mouth as well.
DIY MICKEY MOUSE WREATH PRINTABLE DIRECTIONS
You can easily print off the full list of supplies and instructions below for this easy Mickey Mouse Christmas Wreath DIY. Just print via the printable craft card below.
If you make and love this craft it would mean a lot if you gave it a 5-star rating!
Snowman Mickey Mouse Wreath DIY
Equipment
- Scissors
- Ruler
- Pencil
- Hot Glue Gun & Glue
- Exacto Knife
Materials
- ½ yd White Sherpa Fabric
- 1 12-inch Foam Wreath Form
- 2 6-inch Foam Wreath Forms
- 1 12-inch Bamboo Skewer
- 1 1-inch Foam Ball
- 1 2-inch Foam Ball
- 1 3-inch Foam Ball
- Scrap Orange Craft Foam
- 3 Small Bottle Brush Trees
- 9 Small Black Beads
- 2 Small Black Buttons
Instructions
- Cut the sherpa fabric into 2-inch strips. Hot glue one end of one strip to the back side of the larger foam wreath, then wrap that strip snugly around the foam wreath form, hot gluing it in place periodically. When you have exhausted that strip, hot glue a second strip to the foam wreath form and continue wrapping it. Wrap the entire wreath form, covering it entirely. Repeat with the two smaller foam wreath forms.
- Lay the larger of the wreath forms flat on your table, then position the two smaller wreaths on either side about 6-8 inches apart from each other. Using an excess strip of the sherpa fabric, tie each of the smaller wreaths to the larger wreath snugly. Add a bit of hot glue to the knot to make sure that it doesn’t come undone, if desired.
- Make the snowman Mickey by sliding each of the foam balls in succession onto the bamboo skewer, taking care to go through the center.
- Trim the bamboo skewer to be no longer than 2 inches longer than the base of the largest foam ball.
- Using the exacto knife, cut a small hole in the bottom center of the largest wreath, mostly cutting through the fabric.
- Slide the snowman skewer into the hole in the wreath and hot glue it in place.
- Hot glue the bottle brush trees on either side of the snowman.
- Cut a small triangle from the orange craft foam and glue it to the center of the top ball of the snowman.
- Cut 2 circles of black craft foam with a ¾ inch diameter (the bottom of an acrylic paint container works well for a guide). Cut about ⅛ inch off one side of each of the black circles on one side, making a flat spot. Attach the ears on either side of the snowman’s head using the flat spot to provide more area to glue.
- Add the two small buttons for eyes, five small beads for a smile and four small beads for buttons on the front of the snowman with hot glue. Hang and enjoy!
If you loved this fun Christmas craft be sure to check out these other great craft ideas:
- DIY Mickey Bell Ornament for Christmas
- DIY Baby Yoda Inspired Ornament
- Grapevine Wreath Ornaments with free SVG file
- DIY Grapevine Mickey Christmas Wreath
Be sure to PIN this for LATER and SHARE on FACEBOOK!


Leave a Reply