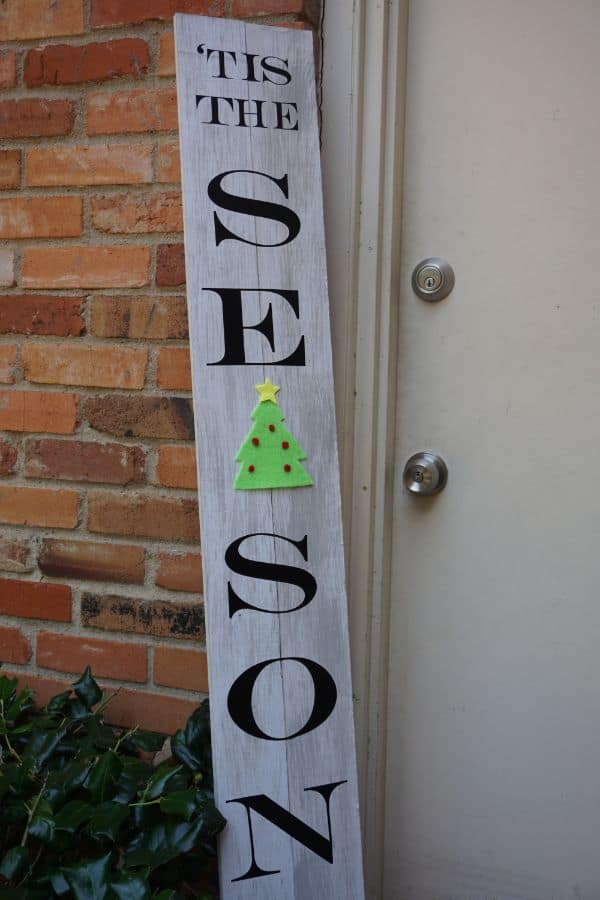
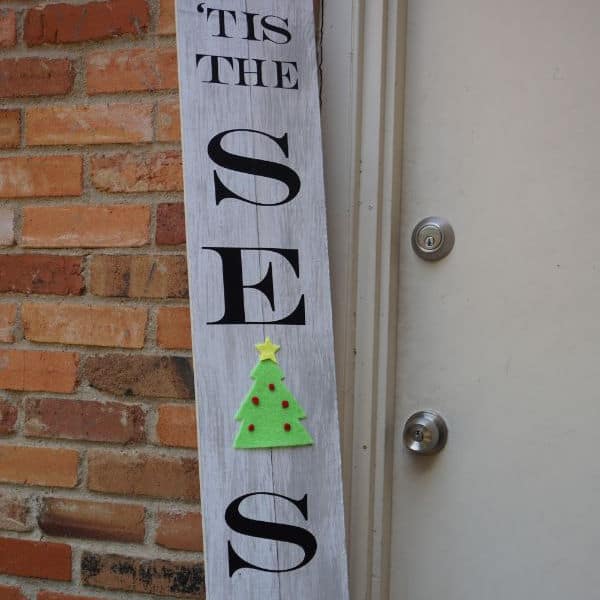
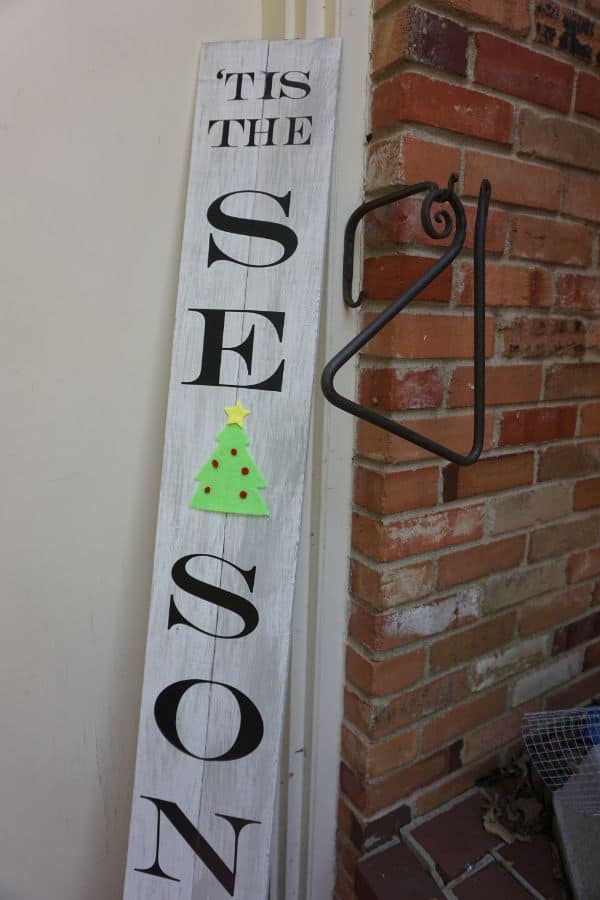
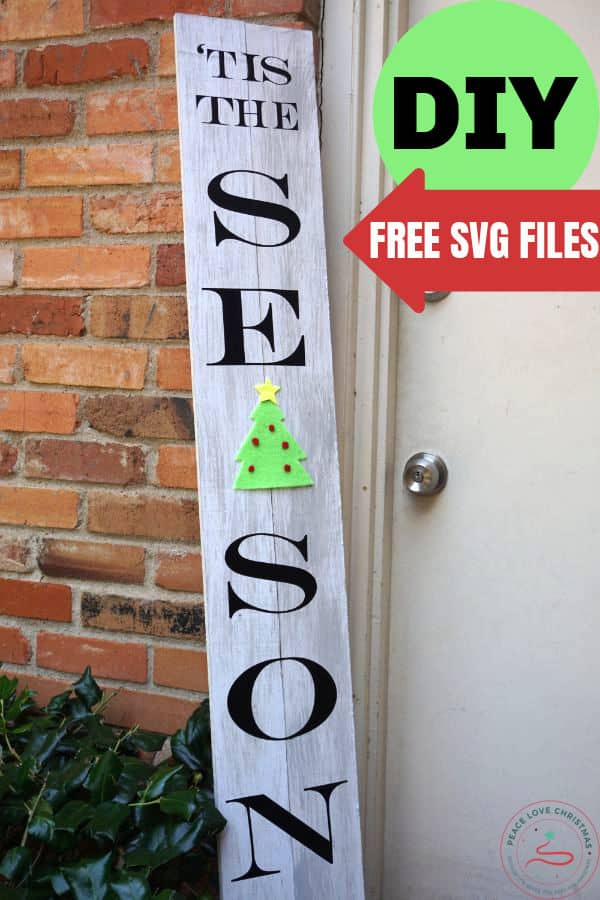
This DIY Christmas porch sign is easy to make and will look great on your porch for years to come. The “Tis the Season” sign will welcome family and guests into your home for the holiday season.
This is a great wooden Christmas craft even for beginners and comes with a free SVG file for you to use with your Cricut or Silhouette machine.
WHAT IS A PORCH LEANER SIGN?
A porch leaner sign is typically a long, tall piece of wood that has some kind of message on it. The sign is generally leaned against the house on the porch and doesn’t require hanging.
Welcome signs are a very popular porch leaner and now seasonal signs are popular, too.
The great thing about these signs is that they don’t take up a lot of space to store and look great even on small porches.
SUPPLIES NEEDED FOR TIS THE SEASON SIGN
This can be customized in different colors based on what you like or want. These are the supplies that were used in this project.
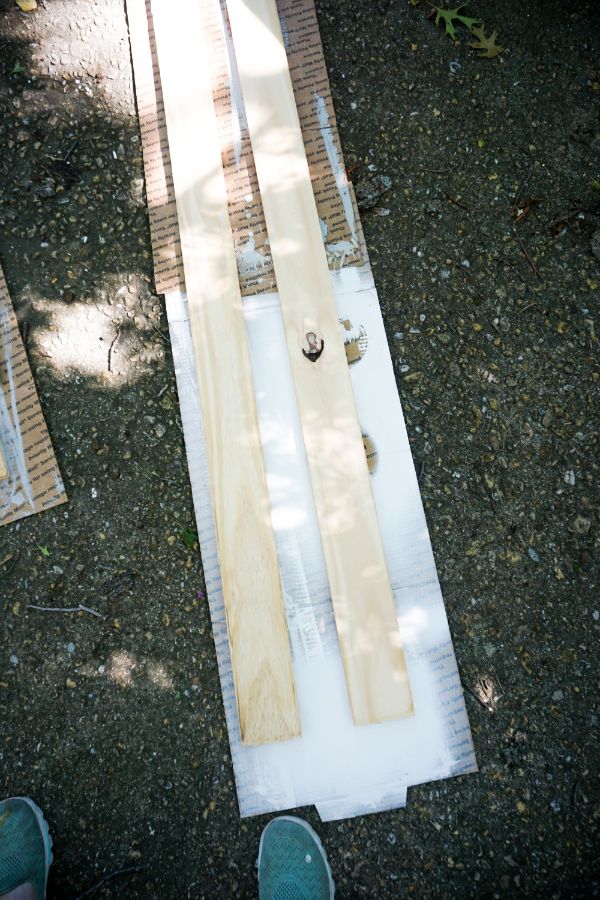
- 2 Fence Planks
- 3 Scrap Pieces of Wood (about 4-inches wide)
- White Paint
- Grey Stain
- Black Vinyl (Cricut has a very nice outdoor vinyl!)
- Craft Felt in:
- Red
- Yellow
- Green
- Free Cut File (you can download it further down the page)
TOOLS NEEDED
This project does require a cutting machine like the Cricut Maker or another electronic cutting machine that can cut fabric, like felt.
- Cricut Maker (or similar)
- Paint Brush
- Hot Glue Gun and Glue
- T-square
- Pencil
HOW TO MAKE A TIS THE SEASON PORCH LEANER SIGN
This DIY Christmas project makes a great gift. If you are going to make one for yourself you may want to consider getting the supplies to make several for Christmas gifts.
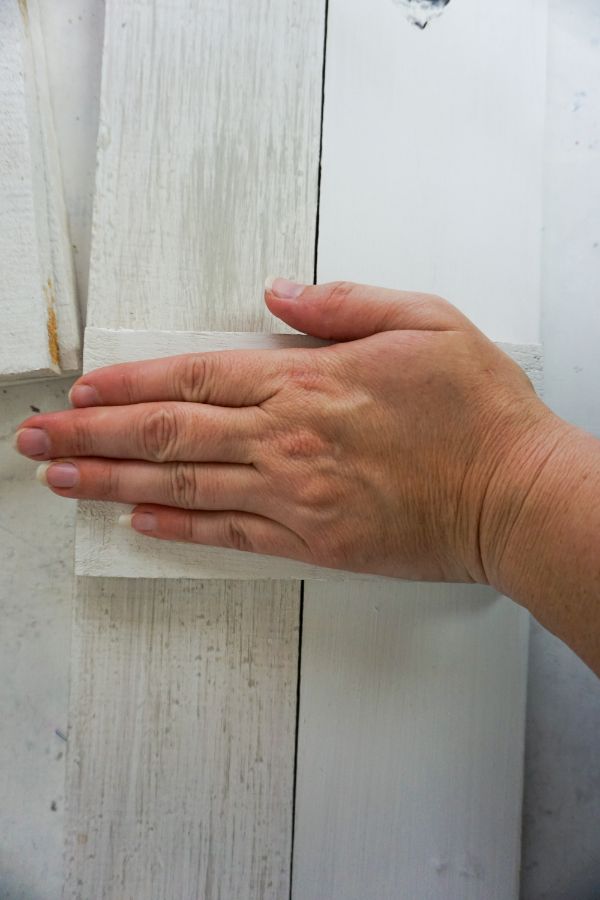
PAINT BOARDS
Paint both sides and all edges of the fence panels and one side and all edges of the scrap wood with the white paint. Allow the wood pieces to dry completely.
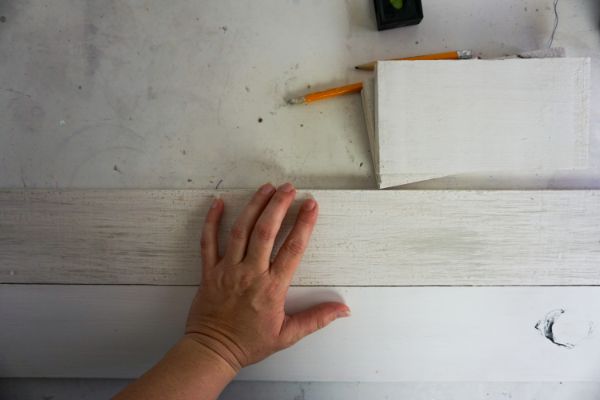
DRY BRUSH STAIN
Dry-brush the grey stain over the fence panels. Allow this paint to dry completely.
GLUE BOARDS TOGETHER
Place the two fence panels side-by-side and hot glue them in place. Hot glue the three scrap wood pieces onto the back of the panels to stabilize them. I like to space out the scrap wood pieces so the whole panel is stable.
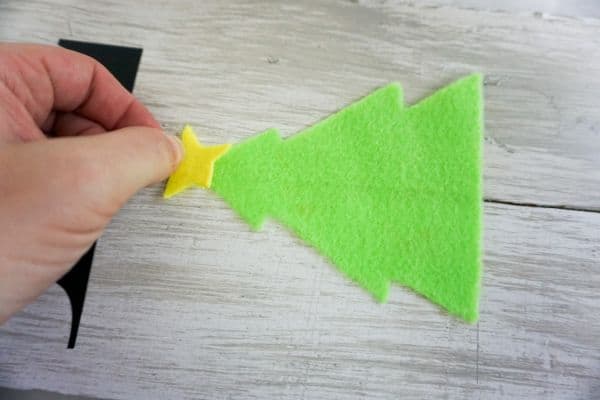
CUT VINYL AND FELT
Download the free svg cut files (below) and then proceed to cut out the letters in vinyl using your electronic cutting machine.
Then cut out the tree shape using green felt and the ornaments using red felt and the star using yellow felt. All of these can be cut with the electronic cutting machine.
DRAW LINES
With the pencil, draw a straight line in each approximate location where you want a letter to sit on your sign using the t-square. This will help you keep your letters lined up appropriately.

ADHERE LETTERS
Affix vinyl letters on the wood, using the pencil lines to guide you to keep the letters straight.

ADD TREE
Hot glue the tree onto the wood where the A should be in Season. Then hot glue the ornaments and star onto the tree.
ERASE PENCIL LINES
Erase your pencil lines and you are done!

DOWNLOAD: FREE SVG CUT FILES
You can download the free SVG cut files for this DIY Tis the Season Porch Leaner Sign by clicking the link below.
Tis the Season Porch Leaner Sign Cut Files
TIPS FOR A GREAT PORCH SIGN
Here are a few tips to make your sign turn out great:
- Remember that if you want a more rustic look it is easy to achieve. After you paint you can use some sandpaper and rough up the edges and corners.
- If you want to change the color of vinyl for the letters it is no problem. Just make them whatever color you choose.
- If you have shorter fence panels just put the letters closer together so that it will still work.
If you loved this easy Christmas craft project be sure to check out these other great tutorials:
- DIY Rustic Burlap Christmas Ornaments
- Easy DIY Grinch Bath Bombs for Christmas
- DIY Wood Slice Ornaments
- Easy DIY Santa Belly Ornaments for Christmas


Leave a Reply