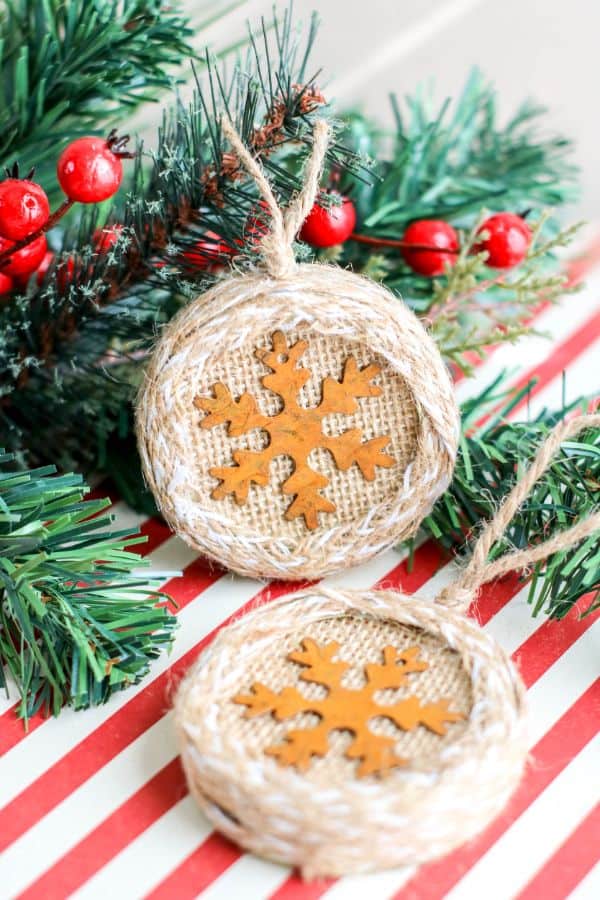
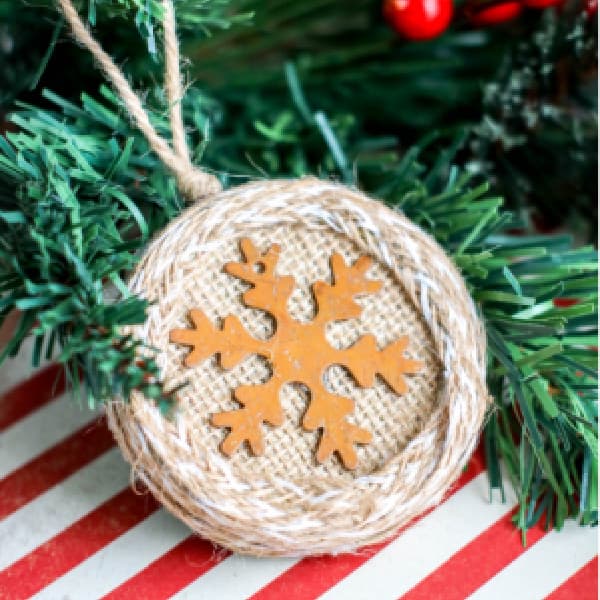
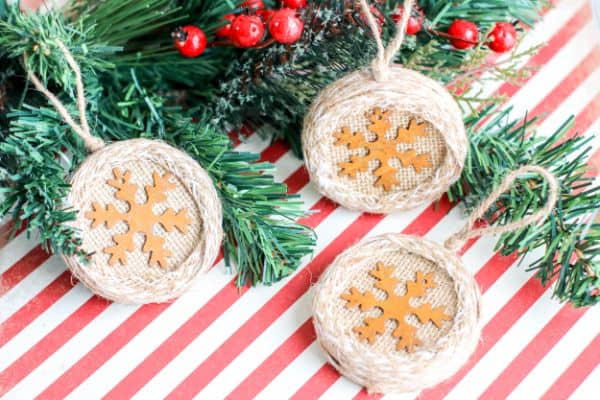
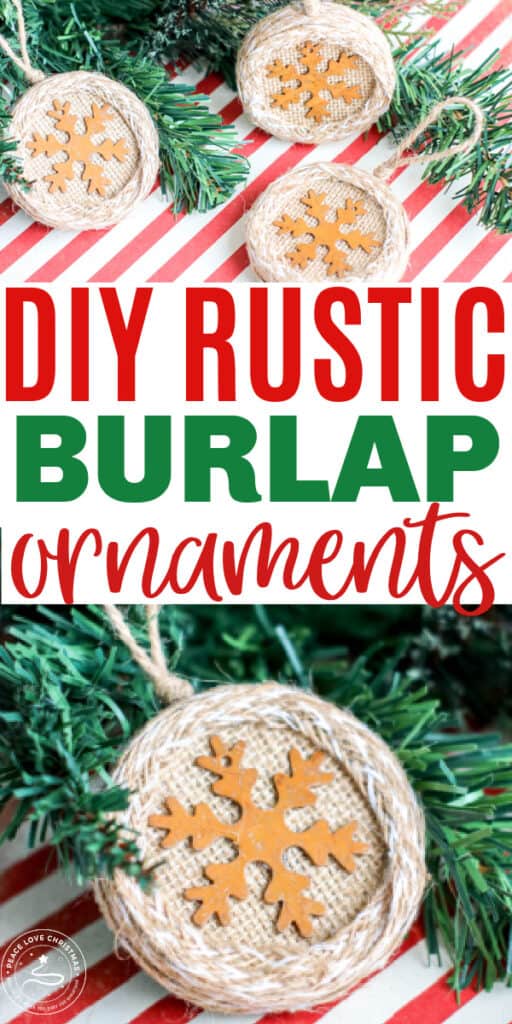
These DIY Rustic Burlap Christmas Ornaments will look lovely on any Christmas tree and are especially perfect for a farmhouse Christmas! This is a quick craft project made with Mason jar lids.
WHAT ARE BURLAP SHEETS?
Laminated burlap sheets are a great shortcut for crafts. (Who doesn’t love a good shortcut in crafting, cooking, and most anywhere in life?) There are tons of things you can do with these sheets. You can actually use them in an inkjet printer, print text on them and frame it.
Paint on them if you want. Get creative because you are going to love working with these burlap sheets.
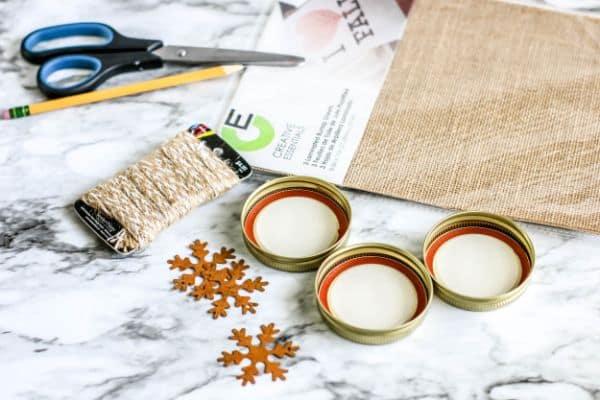
SUPPLIES FOR BURLAP ORNAMENTS
These adorable DIY Rustic Burlap Christmas Ornaments only require a handful of supplies. Depending on how many ornaments you are making will depend on how many of each supply you will need.
- Mason Jar Lid with Rings
- Jute Twine
- Metal Snowflakes
- Burlap or Jute Decorative Trim
- Laminated Burlap Sheets
- Scissors
- Pencil
- Hot Glue Gun and Glue Stick
HOW TO MAKE RUSTIC BURLAP CHRISTMAS ORNAMENTS
I love Christmas ornaments and homemade ornaments are even better. These make a lovely gift or addition to a Christmas package.
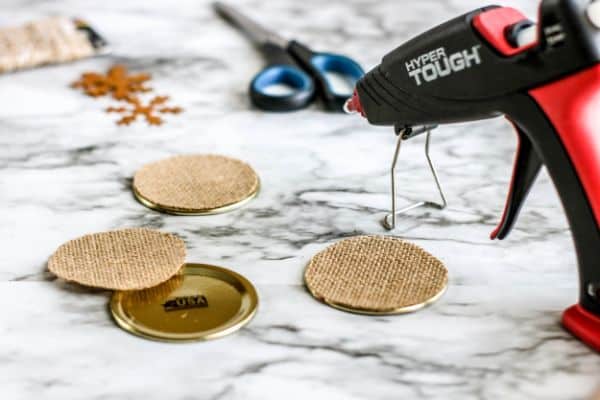
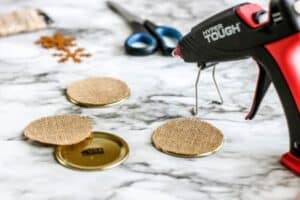
STEP ONE: CUT CIRCLES
Start off by removing the hanger from the snowflake ornament and set it aside for later. I found these snowflake ornaments at Hobby Lobby.
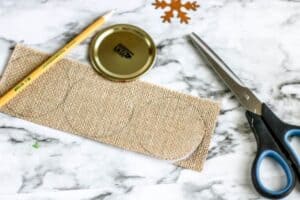
Now put a mason jar lid on the laminated burlap sheet and trace around the lid with a pencil. Do this over if you plan to make more than one ornament.
Cut the circles out of the burlap sheet.

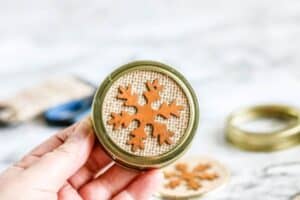
STEP TWO: GLUE BURLAP
Now use some hot glue to attach the burlap circle to the top of the mason jar lid. The burlap is facing outward on the lid.
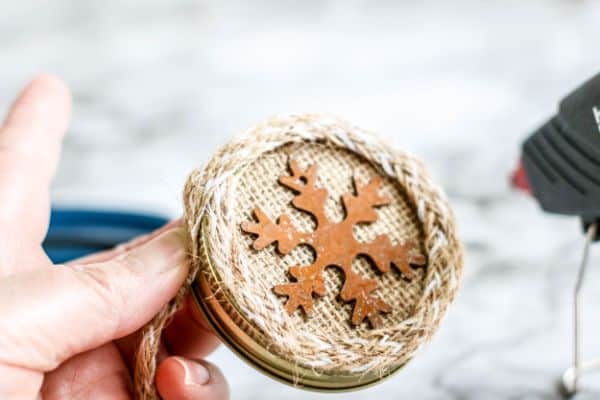
Grab the snowflake ornament and glue it to the top center of the burlap covered lid.
STEP THREE: ATTACH RING
It is time to secure the mason jar lid to the mason jar ring.
Run a small strand of hot glue around the inside edge of the mason jar ring and then insert the mason jar lid and press it into place.

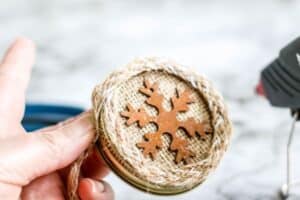
STEP FOUR: COVER RING
Now we want to cover the mason jar ring with the decorative burlap ribbon or jute. Use hot glue to attach what you have to the mason jar ring and cut off any that remains.
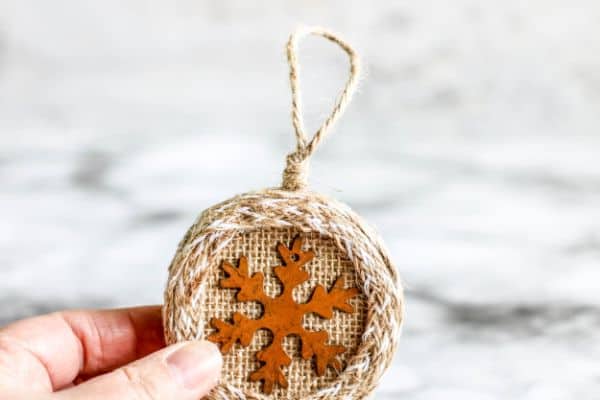
STEP FIVE: ADD HANGER
It is time to add a hanger to the ornament. Cut a piece of jute twine about 5 inches long.
Fold the twine in half and knot the loose end about 1 inch from the end.
Hot glue the loose ends of the twine on the inside rim of the mason jar ring.

Bend the jute twine around the edge and place a small dot of glue on the top to attach the knot.
DIY RUSTIC BURLAP CHRISTMAS ORNAMENT
You can print off the complete supply list and instructions for this pretty burlap wrapped Christmas ornament from the printable card below.

DIY Rustic Burlap Christmas Ornaments
Equipment
- Scissors
- Pencil
- Hot Glue Gun and Glue Stick
Materials
- Mason Jar Lid with Ring regular size
- Jute Twine
- Metal Snowflake smaller than the mason jar lid
- Burlap or Jute decorative ribbon or trim
- Laminated Burlap Sheets
Instructions
- Remove the hanger from the snowflake ornament and set aside.
- Place a mason jar lid on the laminated burlap sheet and trace with a pencil to create the number of circles needed for the ornaments. Cut apart the circles with scissors.
- Using hot glue, attach the burlap circles to the top (outward facing) side of the mason jar lid. Then, use hot glue to attach the ornament in the middle of the burlap circle.
- Run a strand of hot glue around the inside edge of the mason jar ring and insert the lid, pressing into place.
- Cover the metal ring with the burlap ribbon using hot glue, working from the front to the edge. Cut the ribbon at the end.
- Cut a piece of jute twine about 5 inches long. Fold the jute twine in half and knot the loose end about 1 inch from the end. Hot glue the loose ends of the jute twine on the inside rim of the mason jar ring. Bend the jute twine
around the edge and place a small dot of hot glue on the top to attach the
knot.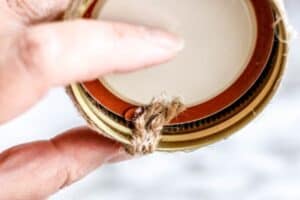
If you loved this easy Christmas craft be sure to check out these other great craft tutorials:
- Easy DIY Grinch Bath Bombs for Christmas
- DIY Wood Slice Ornaments
- Easy DIY Candy Sprinkle Ornaments
- DIY Mason Jar Lid Reindeer Ornament
Be sure to PIN this for LATER and SHARE on FACEBOOK!


Leave a Reply